Past classes... Shakers bake room table 2006.
This is the process I go through building for my classes.
 |
| I Start off with sheet stock . |
 |
| Cut into strips. |
 |
| And into bits... the side pieces of the table. |
 |
| These will get glued into sets. |
 |
| A couple of sets glued together. |
 |
| Glued up |
 |
| Measured and marked for the cuts. |
 |
| These are the sides of the prototype |
 |
All the sides are glued up and marked for the cuts.
I have a few extra made just in case some get messed up.
|
 |
Assembles Note: where the glue up for the sets are in the waste
so when i finish the outer joints I can cut them free.
|
 |
| These two pics ....are cutting out the joint for the back of the piece |
 |
| All outer joints cut . |
 |
| The waste removed and i can separate the sides and pair them up. |
 |
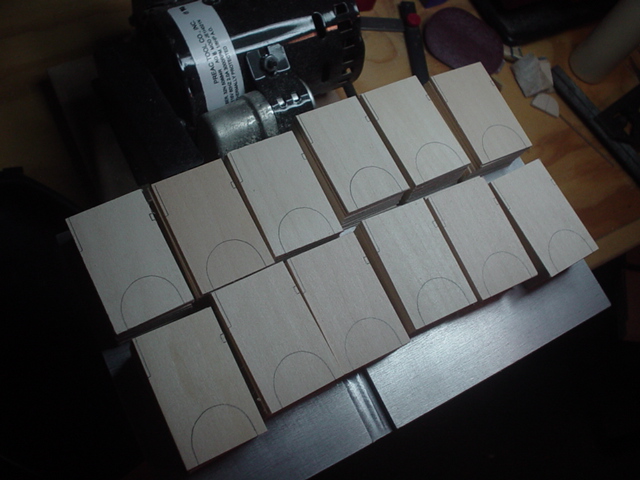
These are all the parts for all the Shaker tables.
I have five per tray and will separate them into kits for the class.
|
 |
100 of these later ( one at a time )
I wish I could find out a way to do these all at once without braking the bank.
|
 |
| The back with a shot of the internals. |
 |
| Installed the outer brackets |
 |
| And the class begins. |
 |
| Pictures of some of my students. |
 |
The finished piece it was a good day.
My wife and I enjoyed every minute of it .
Thank you for your time....
Mario
|


I wish i could find the time to attend a class like yours Mario! The table is a beautiful piece of work and im a huge fan of all shaker furniture, great post and great photos many thanks for sharing. Tony.
ReplyDeleteYour very welcome Tony and Thank you for the compliments.
DeleteOh, I am sure your students must have enjoyed it too! Wow, all that work in cutting so many pieces for the kits, I wonder if the students realize all the work involved in putting a kit together, I hope so.
ReplyDeleteYes they do when they lay out all the parts on the parts page to check for missing pieces.
ReplyDeleteThanks for all the photos, it gives a really good idea of how much it takes to do a project like this. The students must be very pleased with their finished pieces!
ReplyDelete